

The widget is called Order Entry. It was named Order Form until 2.67.5, and its documentation URL keeps the old name.
Open the Order Panel
Click the Buy or Sell button in the top-left corner of the chart to open the Create Order panel. You can also keep the form in your workspace permanently — see Order Entry as a Widget.If no exchange account is connected yet, you’ll be prompted to link one first. See Connect or Create an Exchange Account.
Order Entry as a Widget
Order Entry doesn’t have to be a pop-up. Add Order Entry from the Widget Hub and it stays in your workspace like any other widget — move it, resize it, remove it. It is saved with the workspace, so it comes back where you left it after a reload or a switch between workspaces. Full-screen mode isn’t available for this widget. A widget doesn’t close after you submit an order: it switches to stand-by mode and keeps your settings ready for the next trade. Order Entry also ships in the ready-made layouts — Essentials opens it next to the chart, watchlist, and account. See workspace templates.Linking the Form to a Channel
Order Entry takes part in widget linking — the same numbered channels 1–4 that charts and watchlists use.- Symbol follows the channel. In a linked form the symbol is read-only: to trade something else, switch the instrument in any widget of that channel, or unlink the form and choose the instrument in it directly.
- The trading account follows the symbol. When an instrument is picked anywhere in the channel, the form takes the account you last used on that instrument’s exchange, or the first account you have there if you haven’t traded on it yet. An instrument picked in the Account widget brings the account selected in that widget.
- The form always follows its channel, even when the channel’s Symbol sync is off and the other widgets keep their own instruments. That is why the channel lists Trading account and Trading symbol as syncs that are always on: they cannot be switched off and only matter once an Order Entry joins the channel.
- Pick “–” (Unlinked) to keep the form independent from the rest of the workspace.
One Order Draft per Channel
Each channel keeps a single shared order draft inside a workspace, which is what makes the pop-up and the widget behave as one form:- Start an order from the chart while a linked Order Entry widget is open on the same channel, and the order lands in that widget instead of opening a second form. The last side, price, and entry type carry over.
- The draft and its levels are drawn on a chart only when workspace, channel, and instrument all match. Switch the chart to another instrument and the drawing hides; switch back and it returns with the draft intact.
Editing an existing order or position always opens its own unlinked pop-up form, so it never overwrites the draft in a linked Order Entry widget.
Supported Order Types
- Market Order
- Limit Order
Basic Parameters
- Side: Buy / Sell
- Price: Manual input or chart-based adjustment
- Quantity: Position size
- Order Value / Cost: Auto-calculated
- Buying Power: Funds available for this order
- Time in Force: Good Till Cancelled (GTC)
Buying power and leverage
Buying power shows what you can afford on the selected account. On spot instruments it is always displayed, and with Margin on it includes what you can borrow. On derivatives the exchange only reports it for certain margin modes — on Bybit these are Isolated and Cross — so in Portfolio margin mode the field is not shown. Leverage follows the same split. It appears for derivatives in Isolated and Cross margin modes, both in the order summary and in the confirmation window, and in the summary of a spot order placed with Margin on. In Portfolio margin mode the exchange recalculates leverage dynamically from your whole portfolio, so no fixed value is shown rather than a misleading one.Sizing with the slider
A slider under the size field sets the order size as a share of what the account can afford, whichever unit the field is in — quantity, value, % of equity, or % of buying power. For % of equity it measures against the account’s equity; for the other units, against your buying power.- The slider stops at 100%, but the field itself accepts more — switching between % of equity and % of buying power can legitimately land above 100% when the two differ.
- If the order value comes out larger than your buying power, the size field shows a warning icon. It is a heads-up, not a block: Buy / Sell stays available and the exchange has the final say.
- In Portfolio margin mode there is no buying power to measure against (see above), so neither the slider nor the warning is shown.
Minimum order value
Exchanges reject orders below their minimum order value. When an order comes out smaller than that, the size field shows a warning so you can fix it before sending. The check applies to orders that open or add to a position; a Reduce-Only order is not checked, since it only closes what you already hold.Spot Margin
On Bybit, spot pairs can be traded with borrowed funds. The Margin checkbox at the top of Order Entry turns this on for spot instruments: with it on, an order bigger than your own balance borrows the difference, up to your buying power.- Margin mode and leverage sit next to the checkbox. Leverage is set per asset: one value for the quote asset you borrow to buy (USDT on
BTC/USDT), one for the base asset you borrow to sell (BTC). - Buying Power counts what you can borrow while Margin is on, and only your own balance while it is off.
- Max Buying Amount on the Buy tab and Max Selling Amount on the Sell tab show the most your buying power covers at the entry price. Click one to put that amount into the order.
- Borrow under the quantity and Amount to Borrow in the summary show how much of the order is borrowed: in the quote asset when you buy, in the base asset when you sell.
- Hourly Interest Rate is what Bybit charges per hour on the borrowed amount.
- Spot margin trading has to be enabled on your Bybit account. Where margin isn’t available, the checkbox doesn’t appear.
- Isolated margin mode doesn’t allow it. The checkbox stays off until you switch the margin mode to Cross.
- Borrowed assets keep spot margin on. Bybit won’t let you turn it off until you repay them.
- An order above your buying power is rejected with an insufficient balance error.
Trigger Price (Conditional Logic)
Add Trigger Price turns the order into a conditional one — the TakeProfit name for stop orders. The order stays inactive until the market reaches the trigger price, then executes at the price type you chose: with Market Price it is a Conditional Market order (stop-market), with Limit Price a Conditional Limit order (stop-limit). The chart’s right-click menu offers the same two orders as Stop and Stop Limit. The trigger can follow one of three prices:- Last Price — based on latest trade price
- Mark Price — fair price used to reduce liquidation spikes
- Index Price — aggregated price across exchanges
Risk Management
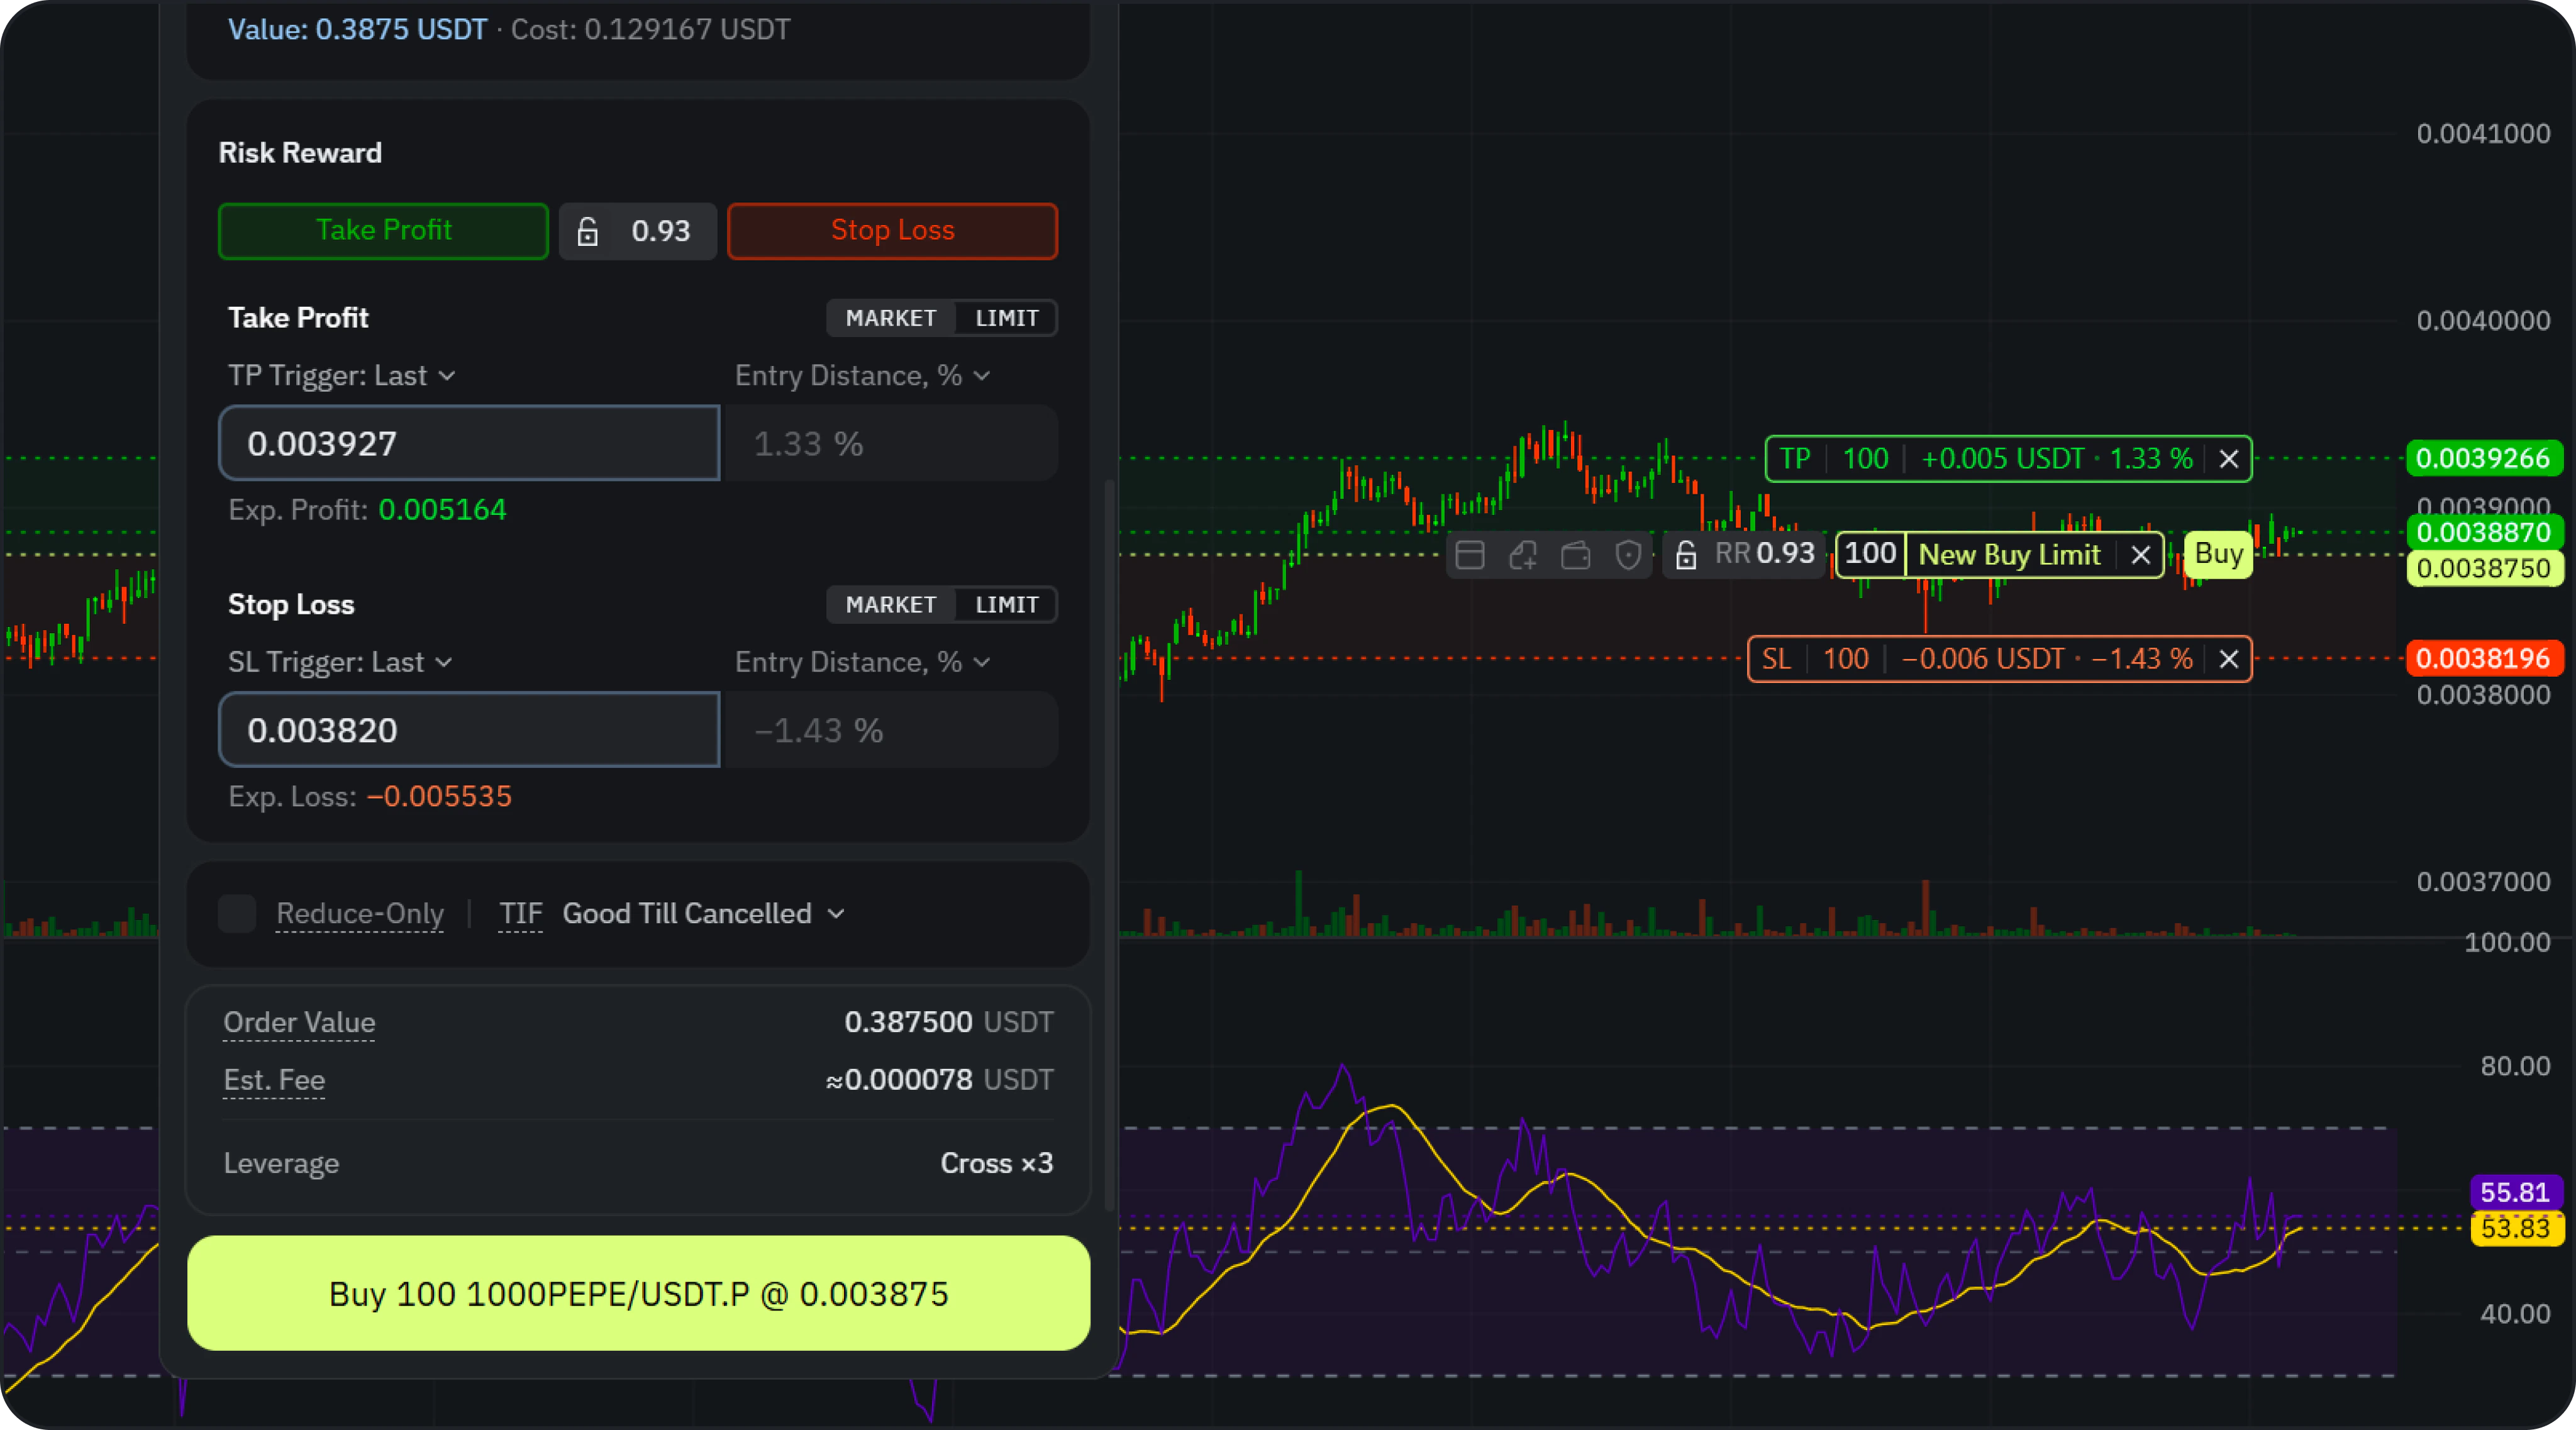
- Take Profit
- Stop Loss
- Risk/Reward (RR)
Reduce-Only
Enable Reduce-Only to ensure the order strictly reduces or closes an existing position without accidentally opening a new one.Reset the Form
Reset returns Order Entry to its default state in one click. It becomes active as soon as the form differs from the defaults, and it clears:- the trigger price — a Conditional Limit order becomes a plain Limit order priced at the bid for a sell or the ask for a buy, and a Conditional Market order becomes a Market order;
- the size — the field is emptied and the cursor is placed in it, ready for the next number;
- risk-based entry, Take Profit and Stop Loss with their values, Reduce-Only, and Time in Force.
Order Templates
A template saves a set of order settings — how you enter, the trigger, the risk, Take Profit and Stop Loss — so you can fill the form in one click instead of typing them in again. Templates belong to your account, not to an instrument: one template works on any symbol, and it follows you to your other devices.Open the Template List
Click the templates button in the top-right corner of Order Entry — next to the three-dot menu in the widget, or next to Esc in the Create Order pop-up. The same list opens from the order pill when you place an order on the chart. Order Templates gives each template two lines: its name, and a row of chips for what it sets. For example, RISK 1% eq. is a risk-based entry sized at 1% of equity, SL 1% is a stop 1% from the entry, and M marks market execution. Hover a chip to read the setting in full. Create Template sits at the bottom of the list. Templates are for new orders only: the button is hidden while you edit an existing order.Create a Template
- Set up Order Entry the way you trade, then click Create Template in the list. The new template starts from the settings already in the form.
- Name it — it starts as New Template — and pick an emoji if you like.
-
In Settings List, click the settings the template should carry:
- Entry — Conditional Order, Market / Limit Order, Risk-Based Entry, Value-Based Entry
- Risk Reward — Take Profit, Stop Loss
- Additional Settings — Reduce-Only, Time in Force
- Click Save.
Apply a Template
Click a template in the list, and its settings land in the form in one go. Star up to ten templates as favorites to get them as buttons beside the templates button and on hotkeys: Alt + 0–9 on Windows, Option + 0–9 on Mac.- Take Profit, Stop Loss, Reduce-Only, and Time in Force always follow the template. If the template leaves them out, applying it turns Take Profit, Stop Loss, and Reduce-Only off, and returns Time in Force to Good Till Cancelled.
- Entry settings — the trigger, the execution, and risk- or value-based entry — change the form only when the template sets them.
- A setting the form doesn’t have is skipped.
- On the chart or in the order book, the price comes from where you click, so the trigger and execution settings are skipped and the rest applies.
Edit or Delete a Template
The list also lets you star, edit, or delete a template. Editing opens the same form, where you can rename the template or change its settings; Save as new template keeps the original and saves your changes as a copy.Confirmation
Before submission, a confirmation modal will display:- Order Price
- Quantity
- Order Cost
- Order Value
- Estimated Fee (approximate, based on exchange data)
- TP/SL levels
- Leverage — for derivatives in Isolated or Cross margin mode; omitted in Portfolio mode
- Risk and Reward ratio
Stand-by mode
After you place an order, Order Entry doesn’t close — it switches to stand-by mode and stays ready for your next trade. It keeps your previous settings, including the order Side, but the side isn’t highlighted until you reactivate the form. To reactivate it, click any interactive element in the form:- Click a Side tab (Buy or Sell) to start the next order on that side.
- Click anywhere else in the form to reactivate it with the same side you used last.
Troubleshooting
The asset can’t be traded
Not every instrument on the platform can be traded — trading runs through the exchanges TakeProfit connects to, and their coverage is narrower than the data coverage. Open Order Entry on an asset none of them supports and you get a message in place of the order controls: it names the exchanges available for trading and offers to switch the asset. The CTA opens Platform Search already filtered down to instruments those exchanges support. The message shows up when you:- open the form with the Buy / Sell buttons in the top-left corner of the chart,
- use the Buy / Sell buttons on the price scale, or
- swap the instrument inside an open Order Entry widget for one that can’t be traded.
”You must agree to the Trading Terms before trading this contract”
Your order was rejected by Bybit and never reached the market. Bybit requires a separate, one-time agreement to its Trading Terms for certain contracts, and that agreement can only be given on Bybit’s own site — TakeProfit cannot accept it on your behalf. This applies to TradFi Perpetuals — contracts that track traditional assets such as gold (XAUUSDT) or shares, rather than crypto.
To resolve it:
- Open bybit.com and log in to the same account you connected to TakeProfit.
- Go to the trading page of the contract you were trying to trade — for example
XAUUSDT. - A Trading Terms dialog appears. Read it, tick I have read and agree to the above Trading Terms, and click Confirm.
- Return to the TakeProfit terminal and place your order again.
The exchange reports this as error 110123 (“You must agree to the Trading Terms”) or 110125 (“You must agree to the Trading Terms before trading this contract”). Both are resolved the same way.
Next step
Trading from the Chart
Adjust entries, TP/SL, and RR visually by dragging levels on the chart.