Prerequisites
Before you begin, ensure you have the following:- Node.js (v14 or higher) installed. You can download it from Node.js Official Website.
- npm (comes with Node.js) or Yarn as your package manager.
- Basic knowledge of React and Next.js.
- Access to the TakeProfit platform for widget integration and testing.
Set Up a Next.js Project with App Router
Next.js introduces the App Router, which provides a new way to organize your application’s routes and components.-
Create a New Next.js Project
Open your terminal and run the following command to create a new Next.js project:
Replace
my-tp-widgetwith your desired project name. -
Navigate to Your Project Directory
-
Verify App Router is Enabled
Ensure that your project uses the App Router by checking the presence of the
appdirectory.You should see anappdirectory among others.
Install the TakeProfit Widget SDK
Integrate the TakeProfit Widget SDK into your Next.js project to enable communication between your widget and the TakeProfit platform.-
Install the SDK via npm
Alternatively, if you prefer using Yarn:
-
Verify Installation
Check your
package.jsonto ensuretakeprofit-widget-sdkis listed underdependencies:
Create the Widget Page
Create a dedicated page for your widget within the App Router structure.-
Create the Widget Directory and Page
In the
appdirectory, create a new folder namedwidgetand add apage.jsxfile: -
Implement the Widget Component
Open
app/widget/page.jsxand add the following code:Explanation:- Initialization: The SDK is connected using
TPWidgetSDK.connect(), and the loader is hidden withTPWidgetSDK.hideLoader(). - Subscriptions: The widget subscribes to state changes for both the widget itself and the associated channel.
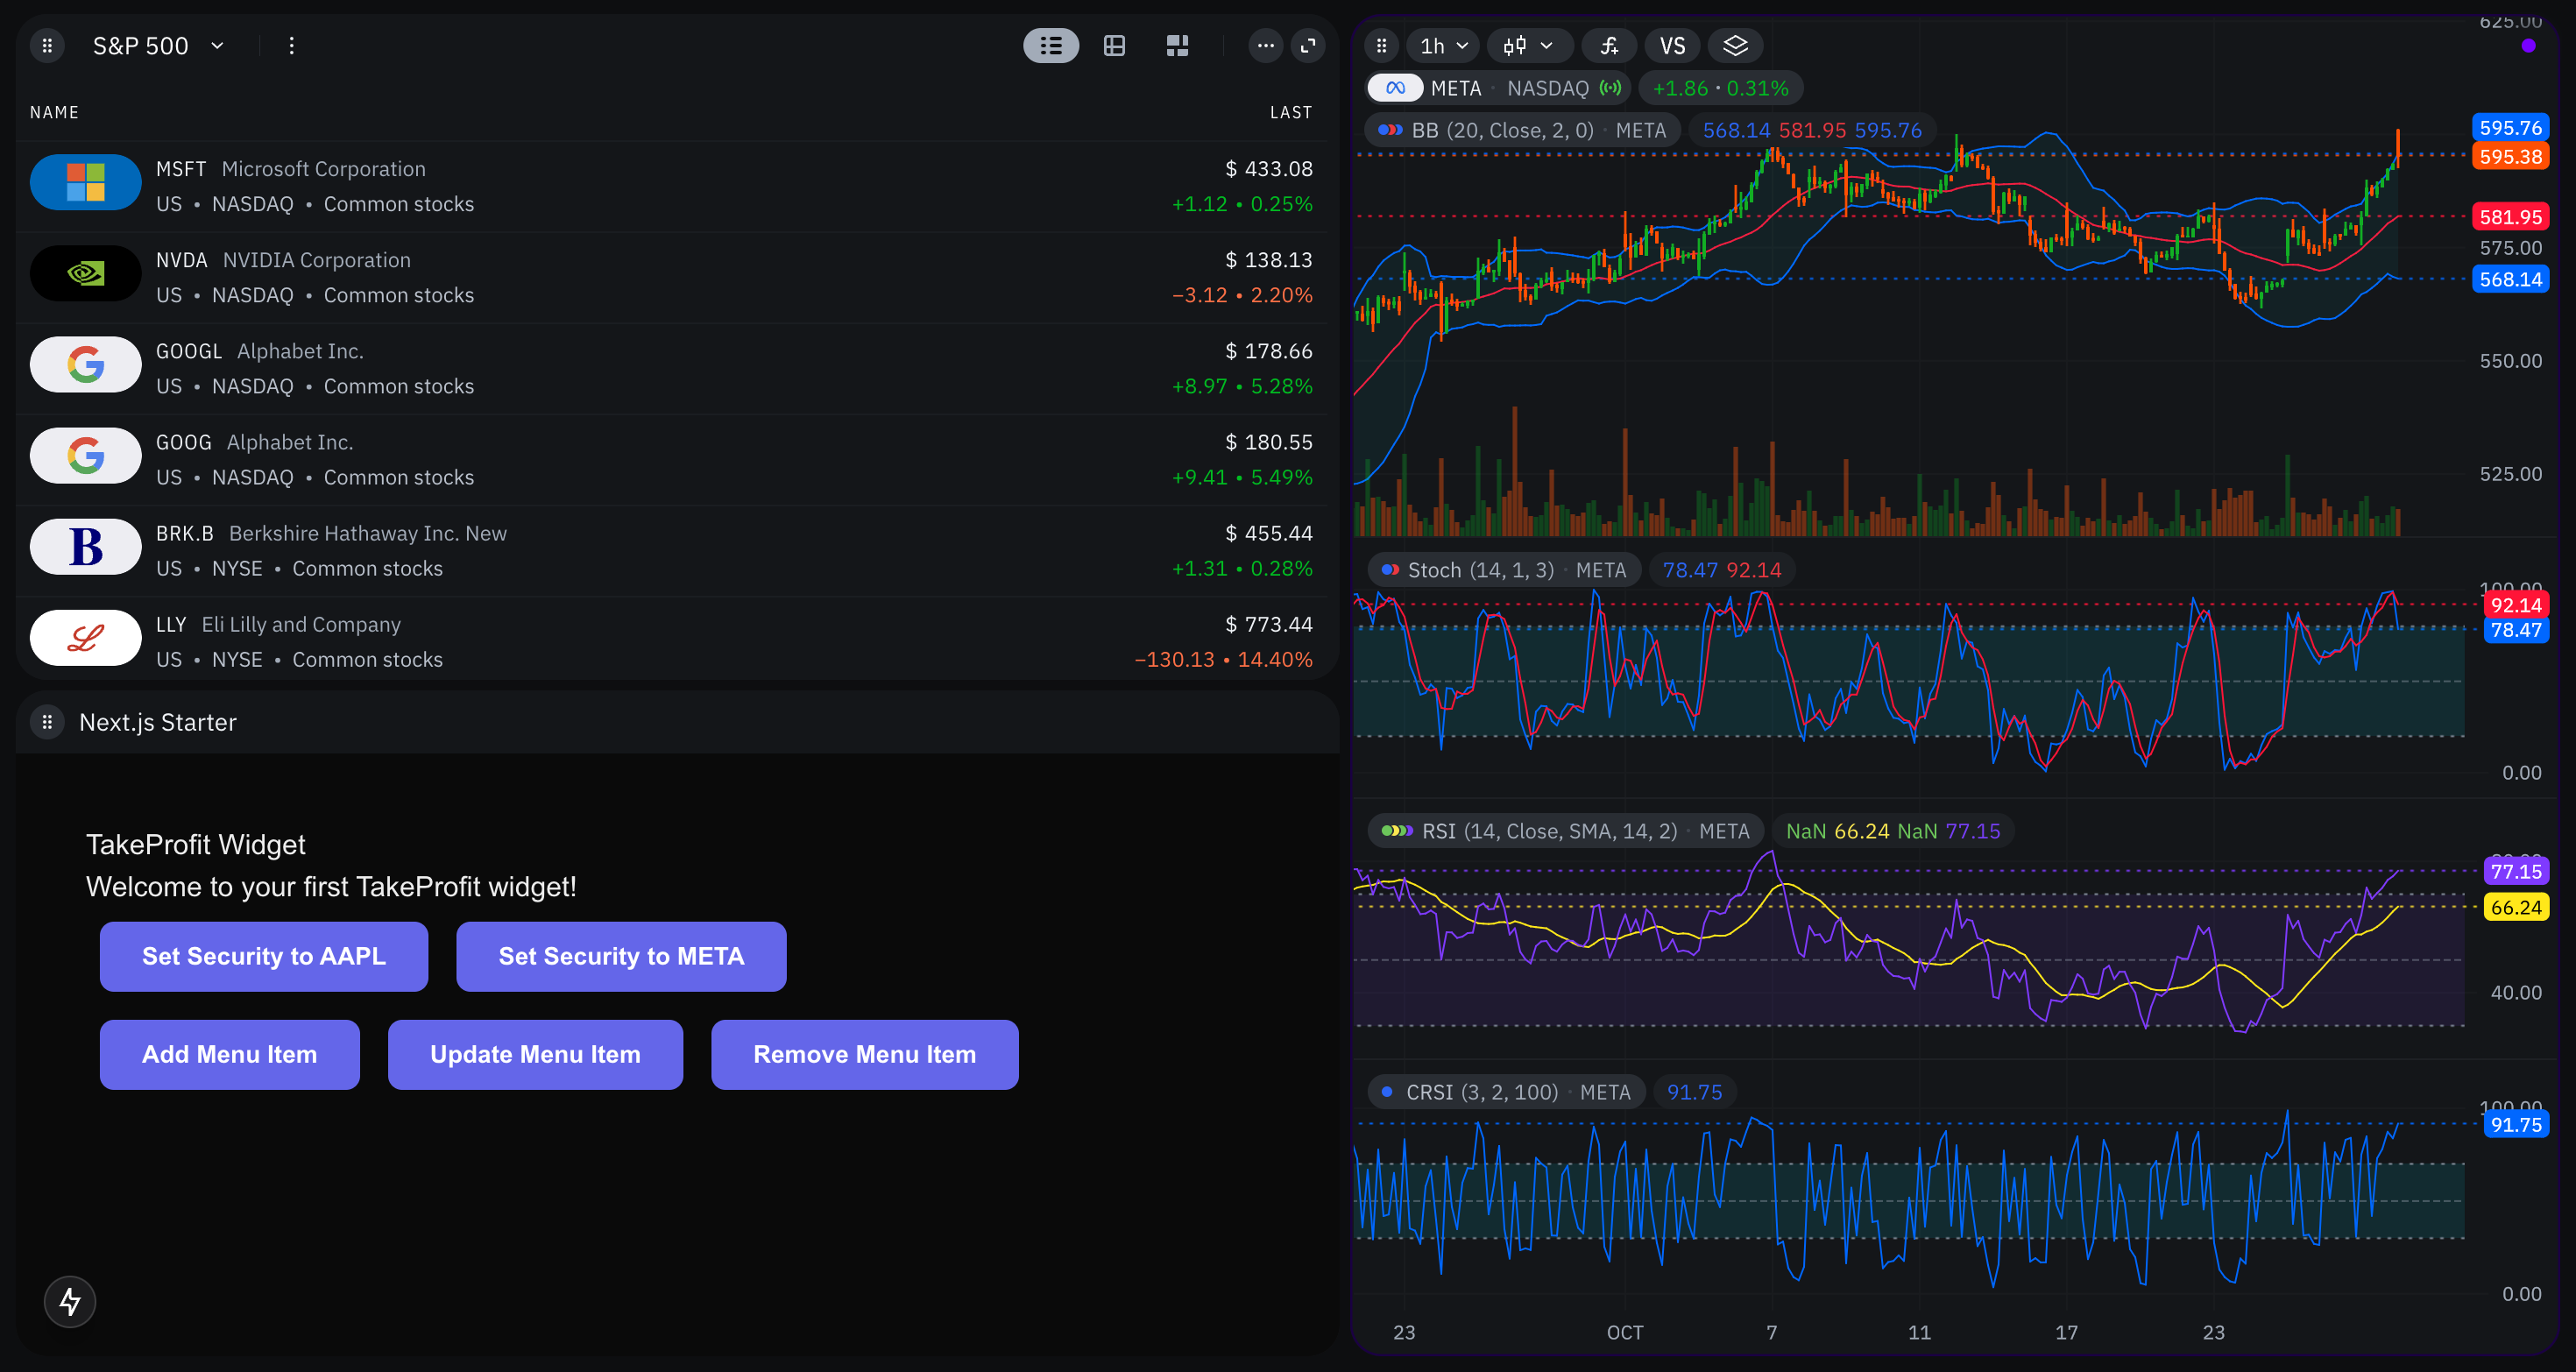
- Security Change: Provides buttons to change the displayed security to AAPL or META, demonstrating interaction with the platform.
- Initialization: The SDK is connected using
Configure Next.js Headers for Security
To ensure that your widget can be embedded securely within the TakeProfit platform, you need to configure specific HTTP headers in your Next.js application.-
Create or Update
next.config.jsIn the root of your project, create or modify thenext.config.jsfile to include the following configuration:Explanation:X-Frame-Options: This header controls whether your site can be embedded in an iframe. Setting it toALLOW-FROM https://takeprofit.comallows the widget to be embedded only from the specified origin.Content-Security-Policy: Theframe-ancestorsdirective specifies valid parents that may embed a page using<frame>,<iframe>,<object>,<embed>, or<applet>. Setting it to'self' https://takeprofit.comallows framing from the same origin and the specified TakeProfit domain.
Initialize the SDK and Handle Messages
Ensure that your widget properly handles incoming messages and maintains state accordingly.-
Understand the SDK’s Internal Mechanisms
The SDK uses
postMessagefor communication between the widget (iframe) and the parent TakeProfit platform. It handles various message types to manage state and interactions. -
No Additional Configuration Needed
The SDK automatically manages message listeners upon calling
TPWidgetSDK.connect(). However, ensure that your widget’s domain is trusted by the TakeProfit platform to allow communication.
Add Menu Items
Enhance your widget by adding custom menu items to the widget header. Update yourWidgetPage component to include functions for adding, updating, and removing menu items.
- State Management: Uses React’s
useStateto keep track of the added menu item’s ID. - Add Menu Item: Adds a menu item labeled “Refresh Data” with a callback that logs to the console.
- Update Menu Item: Updates the label of the existing menu item.
- Remove Menu Item: Removes the existing menu item.
Test Your Widget Locally
Verify that your widget integrates correctly with the TakeProfit platform by testing it in a local environment.-
Start the Development Server
By default, Next.js runs on
http://localhost:3000. -
Configure Local Storage for Testing
To simulate the widget’s presence on the TakeProfit platform, configure local storage in your browser:
- Open the TakeProfit platform in your browser.
-
Open the developer console (
F12orCtrl+Shift+I). -
Execute the following command, replacing
<your-iframe-url>and<icon-url>with your actual widget URL and an icon URL:
- Reload the TakeProfit Platform Refresh the TakeProfit platform page. Your widget should now appear in the widget panel, allowing you to add it to the dashboard and interact with its functionalities.
-
Verify Functionality
- Security Change: Click on the “Set Security” buttons and observe the console logs for successful changes.
- Menu Items: Add, update, and remove menu items, ensuring that callbacks are executed as expected.
Deploy Your Widget
Once testing is successful, deploy your widget to a live environment.-
Build the Project
-
Start the Production Server
Ensure that your widget is accessible over HTTPS in a production environment for secure communication with the TakeProfit platform.
-
Update Local Storage Configuration
Replace the
iframeUrlin local storage with your deployed widget’s URL: - Final Testing Reload the TakeProfit platform and verify that your deployed widget functions correctly in the live environment.
Best Practices
-
Unique Identifiers: Ensure that
requestIdandmenuItemIdare unique to prevent conflicts. -
Unsubscribe When Necessary: Clean up subscriptions using
unsubscribeWidgetChangeandunsubscribeChannelChangeto prevent memory leaks. - Error Handling: Implement robust error handling for all asynchronous operations to enhance user experience.
- Performance Optimization: Limit the number of active subscriptions and avoid unnecessary state updates to maintain optimal performance.
- Documentation: Keep your code well-documented to facilitate maintenance and future enhancements.
Next Steps
Congratulations on creating your first widget with the TakeProfit Widget SDK! To further enhance your widget, consider the following:- Explore Advanced SDK Features: Dive deeper into the SDK Reference to utilize all available methods and message types.
- Implement Real-Time Data: Integrate real-time data feeds to provide dynamic and up-to-date information within your widget.
- Customize the UI: Enhance the user interface with additional React components and styling to improve user engagement.
- Add More Interactions: Implement more interactive features like custom events, notifications, and user preferences.
- Optimize: Ensure your widget is responsive and functions seamlessly across different devices and screen sizes.